Pre-requisites: You should now have all the equipments are hardwares required to setup the POS, this includes but is not limited to below, depending on your business needs:
This setup guide is intended for Volcora hardwares and does not guarantee fully working on other devices.
- Volcora POS Terminal (iPad or Android Tablet is compatible)
- Volcora Receipt Printer (LAN or WIFI) (EPSON or other brands with LAN or WIFI functionality is also compatible)
- Volcora Receipt Printer (LAN or WIFI) (For Kitchen)
- Volcora Label Printer (EPSON TM-L90 or Zebra Printers also compatible)
- Volcora Barcode Scanner (USB)
- Volcora Cash Drawer
- PAX A Series or S300 Card Terminal
- 5/8/16 Ports LAN Switches
- WIFI-LAN Adaptor (Optional)
- Several RJ45 Cables
- Windows Laptop/PC for printer setup
TABLE OF CONTENTS
- Step 1: Network Setup
- Step 2: Setup POS Terminal
- Step 3: Setup Receipt Printer(s)
- Step 4: Setup Cash Drawer
- Step 5: Setup Kitchen Printer(s)
- Step 6: Setup Label Printer(s)
- Step 7: Setup PAX Card Terminal
- Step 8: Setup Barcode Scanner
- Step 9: Configuration of all devices in POS
Step 1: Network Setup
Before anything, we need to setup your networking to make sure all devices are connected to the same network. This can be done in two ways: 1. Via WiFi-LAN Adapter, 2. Via wired cable to router.
Items needed in this setup includes:
- WiFi Router
- LAN Switches
- (Optional) WiFi - LAN Adapter
- Several RJ45 Cables
Via WiFi - LAN Adapter:
- Connect Adapter to power outlet, in between your wifi router and POS devices.
- Set up Adapter according to the instruction in user manual
- Once setup, you should have an additional network name that is under the adapter
- Note down the IP address
- Connect Port 1 of your LAN switch and the adapter by using RJ45 cable
- Your network is now set up! Simply connect your devices/hardwares to the switch or connect to the adapter network.
Via cable to router:
- Connect Port 1 of your LAN switch and the router by using RJ45 cable
- Your network is now set up! Simply connect your devices/hardwares to the switch or connect to the WiFi network.
Step 2: Setup POS Terminal
Next, you would need to set up your terminal.
Items needed in this setup includes:
- Volcora POS Terminal
- Plug in your terminal and turn it on
- Connect to the WiFi network or your adapter WiFi network
- Go to Settings -> About -> Status -> IP Address and note down the IP address
- Download Volcora POS from volcora.com/support and install
- You should now be able to login to the POS using your credentials
Step 3: Setup Receipt Printer(s)
After your POS is running, if you need a receipt printer, you would need to setup the printer, connect to the switch, set a static IP address so they are in the same network. Or if you have purchased Volcora Android Terminal and Volcora Printer, and only require one receipt printer, you may choose to connect via USB.
Via USB:
Items needed in this setup includes:
- Volcora POS Terminal
- Volcora Receipt Printer
- USB Cable
- Plug in printer to Android Terminal using USB cable
- Navigate to Cloud POS - Hardware Settings - Turn ON 'USB Printer'
- Log out of Cloud POS and Restart your computer
- Try test print an order. If it does not print successfully, you may need to try connecting via another method (ie. Ethernet, WIFI, etc)
- Note: This method is only applicable for ONE printer for receipt printing only. If you have multiple printers or are using kitchen printer, please connect via another method. This method currently does not support Cash Drawer Auto Open, we are working to resolve the issue.
Via LAN/Ethernet:
Items needed in this setup includes:
- Volcora POS Terminal
- Windows PC/Laptop with USB
- Volcora Receipt Printer
- RJ45 cables
- LAN Switch
- Plug in power outlet of the printer, connect LAN port to the switch with RJ45 (skip if Wireless Printer), connect USB port to your laptop
- Setup your receipt printer according to manual so it can be printed from your Windows computer
- Follow instruction to properly set up your printer to the network within same IP subnet.
- How to Change IP: https://help.volcora.com/en/support/solutions/articles/73000601503-how-do-i-change-my-printer-s-ip-address-
Different Connection Types: - WiFi-LAN Adapter: https://help.volcora.com/a/solutions/articles/73000590055
- Cabled: https://help.volcora.com/a/solutions/articles/73000590056
- Wireless Printer: https://help.volcora.com/a/solutions/articles/73000590058
- How to Change IP: https://help.volcora.com/en/support/solutions/articles/73000601503-how-do-i-change-my-printer-s-ip-address-
- Record your printers IP address
- Go to back office of your POS https://volcora.upos.io/
- Under Settings -> Stores -> Printers -> Receipt Printers -> Add Receipt Printer
- Input values as below (change IP address to your printer's IP address, leave Printer Model as blank)
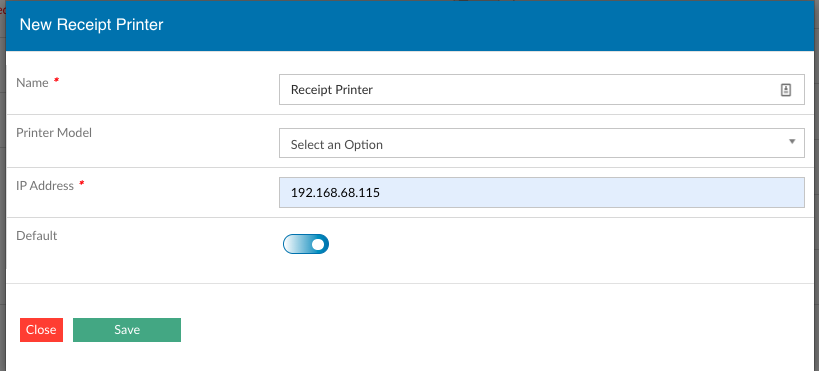
- Your printer should now be setup. You may change the template of your receipt in Front End Receipt Option in back office.
Step 4: Setup Cash Drawer
In case you need a cash drawer to open with receipt printing, please follow below steps. Cash drawers are kick opened by printing triggers, so all you need to do is connect cash drawer to the printer.
Items needed in this setup includes:
- Volcora POS Terminal
- Volcora Receipt Printer
- RJ11 cable
- Volcora Automatic Open Cash Drawer
- Connect cash drawer to printer with RJ11 cable
- Make sure your cash drawer is unlocked
- In POS Terminal front of the house screen, go to Till Management and test open cash drawer
Step 5: Setup Kitchen Printer(s)
Kitchen Printer works the same way as receipt printer, except for different setup in back office for kitchen printing
Items needed in this setup includes:
- Volcora POS Terminal
- Windows PC/Laptop with USB
- Volcora Receipt Printer
- RJ45 cables
- LAN Switch
- Plug in power outlet of the printer, connect LAN port to the switch with RJ45 (skip if Wireless Printer), connect USB port to your laptop
- Setup your receipt printer according to manual so it can be printed from your Windows computer
- Follow instruction to properly set up your printer to the network within same IP subnet.
- WiFi-LAN Adapter: https://help.volcora.com/a/solutions/articles/73000590055
- Cabled: https://help.volcora.com/a/solutions/articles/73000590056
- Wireless Printer: https://help.volcora.com/a/solutions/articles/73000590058
- Record your printers IP address
- Go to back office of your POS https://volcora.upos.io/
- Under Settings -> Stores -> Printers -> Kitchen Printers -> Add Kitchen Printer
- Input values as below (change IP address to your printer's IP address, leave Printer Model as blank)

- Your printer should now be setup. You may change the template of your receipt in Kitchen Receipt Template Option in back office.
Step 6: Setup Label Printer(s)
To print sticky labels, you would need to setup label printer. This is similar to receipt printer. Please note Volcora label printers are Zebra Label Printer so you would be using Zebra Template.
Items needed in this setup includes:
- Volcora POS Terminal
- Windows PC/Laptop with USB
- Volcora Label Printer
- RJ45 cables
- LAN Switch
- Plug in power outlet of the printer, connect LAN port to the switch with RJ45, connect USB port to your laptop
- Setup your label printer according to manual so it can be printed from your Windows computer
- Follow instruction to properly set up your printer to the network within same IP subnet.
- Record your printers IP address
- Go to back office of your POS https://volcora.upos.io/
- Under Settings -> Stores -> Printers -> Label Printers -> Add Label Printer
- Input values as below (change IP address to your printer's IP address, if you are using Volcora Label Printer, select Zebra Label for printer Type)

- Your printer should now be setup. You may change the template of your receipt in Label Template -> Zebra Label Template in back office.
Step 7: Setup PAX Card Terminal
If you are using PAX device purchased from us, your device should have been setup to work with the system. Only thing you would need to do is make sure IP is within network and static.
Items needed in this setup includes:
- Volcora POS Terminal
- PAX Card Terminal
- RJ45 cables
- LAN Switch
- Power up your PAX device by plugging into the outlet
- Either connect your PAX device to WiFi/Adapter network, or using Ethernet to connect to the switch
- For Ethernet, change your IP to static IP by following steps below
- Open settings
- Type in the default PAX password – pax9876@@
- Tap ethernet
- Enable ethernet
- scroll down to the botton and tap Ethernet Configuration
- Select Static IP
- Enter in your IP address
- Enter in your Netmask
- Enter in your Gateway
- Enter in your DNS server
- Push save
- Record down the IP for your card terminal
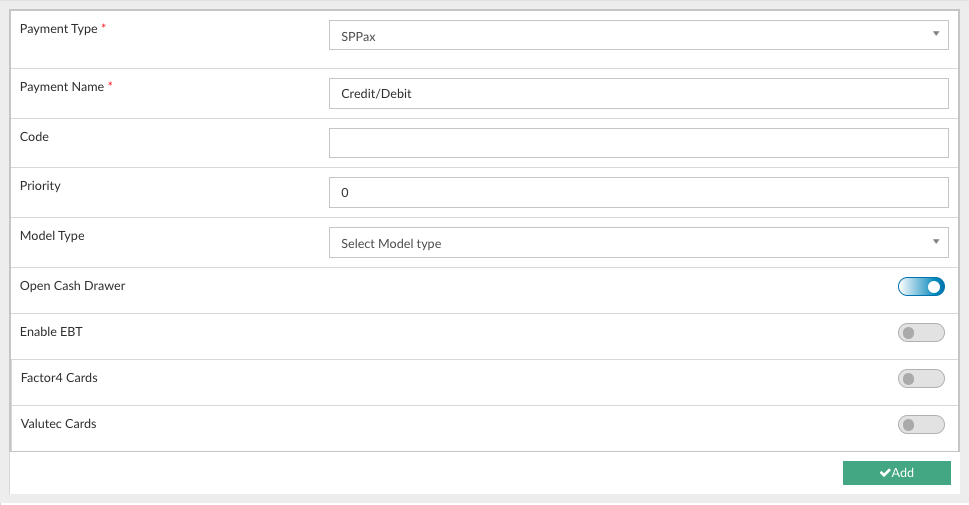
- Add PAX device to back office, go to Settings -> Store -> Payments and add on right side for EMV setting

- One the same page, add your device to payment method
- Finally, you would need to enable it in FOH POS, under Hardware Settings -> Card Reader, select your added device

- You should now be able to run a transaction, select Credit Card, and device will automatically prompt for payment
Step 8: Setup Barcode Scanner
Setting up barcode scanner is fairly simple, we recommend using USB scanner or 2.4G wireless scanner.
Items needed in this setup includes:
- Volcora POS Terminal
- Volcora Barcode Scanner
- Connect USB or USB dongle to your POS terminal
- Wait for a few seconds for drivers to install and you should now be able to scan
Step 9: Configuration of all devices in POS and additional resources
Make sure you use below resource for additional help:
https://help.volcora.com/support/solutions/73000347792
https://help.volcora.com/support/solutions/folders/73000560811
For any further questions, contact support-pos@volcora.com
Was this article helpful?
That’s Great!
Thank you for your feedback
Sorry! We couldn't be helpful
Thank you for your feedback
Feedback sent
We appreciate your effort and will try to fix the article