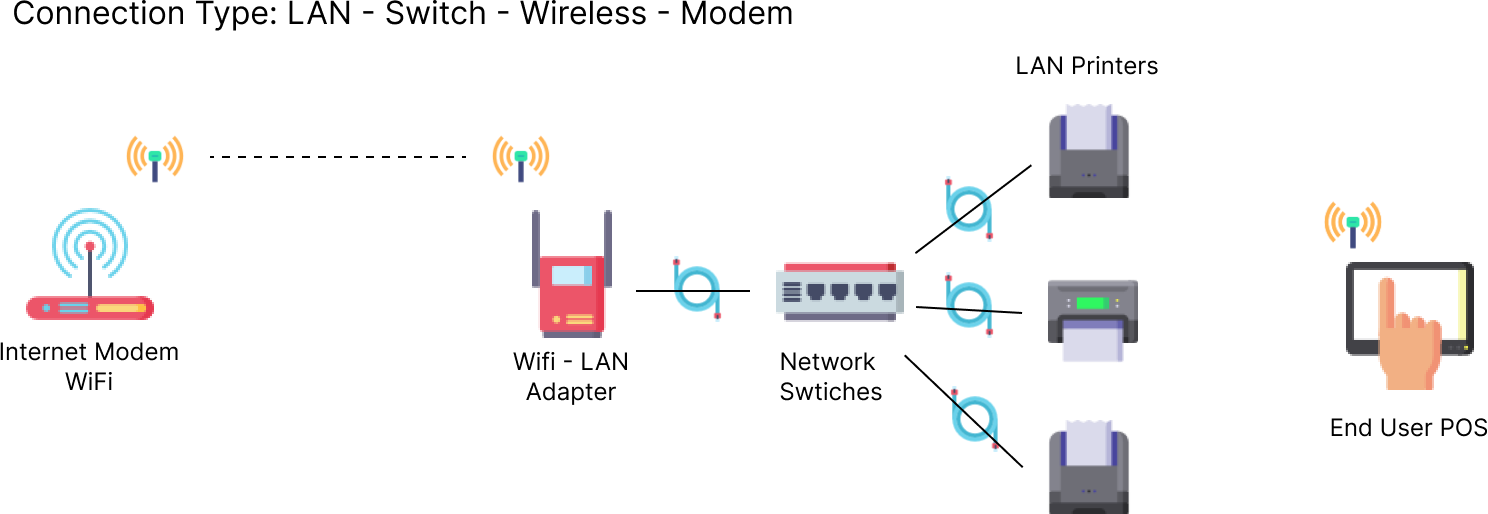
Via LAN - Wireless Extender - Switch - Modem
Connect BrosTrend Extender and setup following the instructions
Connect Printer to the Extender via Ethernet cable
Find out IP address range of the PC/POS and Extender (ie. 192.168.68.xx)
Use IPCONFIG in cmd
Use IP Scanner
If extender IP range is different from default printer IP address (Volcora default 192.168.1.114), for example, 192.168.68.xx is different from 192.168.1.xx. Modify extender IP to 192.168.1.xxx so you can communicate with Volcora Printer (If same subnet, skip to Step 10)
To Modify extender IP, Go to Control Panel - Network and Sharing Center - Change Adapter Settings - WiFi - (Right Click) Properties - IPv4 - Properties
In Properties, input below:
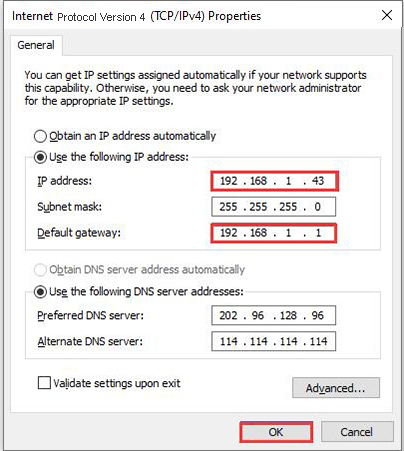
You should now be disconnected from WiFi and in same IP range as printer
Enter 192.168.1.114 to IE, this should open up Printer configuration page. Enter 192.168.68.xxx (any available port in whatever IP range your extender is in, ie 192.168.1.115) in Printer Network Setting, and click Setup to complete setup.

Your Volcora Printer should now be in the same IP range as extender
Connect your PC/POS back to the extender wifi network by setting “Obtain IP Address Automatically” in Step 5.
Install Volcora Printer Driver
Once installed, go to Printer Properties - Ports - Add Port - Standard IPv4 Port. The IP address should be the same as what you previously set in printer setup page, in this example case - 192.168.1.115
Apply and close the window, you should now be able to print a test page
Apply this IP to your POS Software Printer setting to enable printing
Via Wireless Extender Multiple Printers
Repeat Above steps for each Printer
Record down IPs for each Printer
Use Switcher to connect all printers with extender
Set Flow Control to ON for each printer on TP-Link Config
Was this article helpful?
That’s Great!
Thank you for your feedback
Sorry! We couldn't be helpful
Thank you for your feedback
Feedback sent
We appreciate your effort and will try to fix the article