Before getting started, please make sure you have the USB+Ethernet V-WRP2 Series Receipt Printer by Volcora. This operation is for Windows only.
USB:
- Visit https://volcora.com/pages/support-center and download & install Driver for Windows
- Download Testing Tool and open
- Make sure you have USB connection selected, click "Advanced" and set "EPSON" to ON.
- Or Follow below screenshot to enable EPSON

- Save and close
Ethernet/LAN :
Notice
a) A square register device can only be connected to one receipt printer.
b) Same method also applies to the connection between the printer and the Square POS on iPad.
If you are using LAN for Square printing, Make sure you connect the Printer to your internet router and connect Square device to the same network, do not connect the printer to Square in any way. Please then follow one of the below additional setups:
Method A (Change IP Via USB) :
- Use USB to connect to your PC
- Open the same Testing tool, with USB selected, click Set DHCP, this will automatically assign an IP address for your printer. Do a self-test print to check IP (Turn off printer -> Hold on to the Feed button -> Turn on printer with Feed button held -> Release Feed button after 5 seconds, self test should be printed with IP)
- If you prefer manually setting IP, fill in the new IP section and click Set New IP

Method B (Change IP Via ETHERNET) :
- Download NET Setting Tool from Support site
- Use a network cable to connect the printer and the computer to the same router
- Open the tool, switch the ‘Net DHCP’ on according to the steps in the figure below
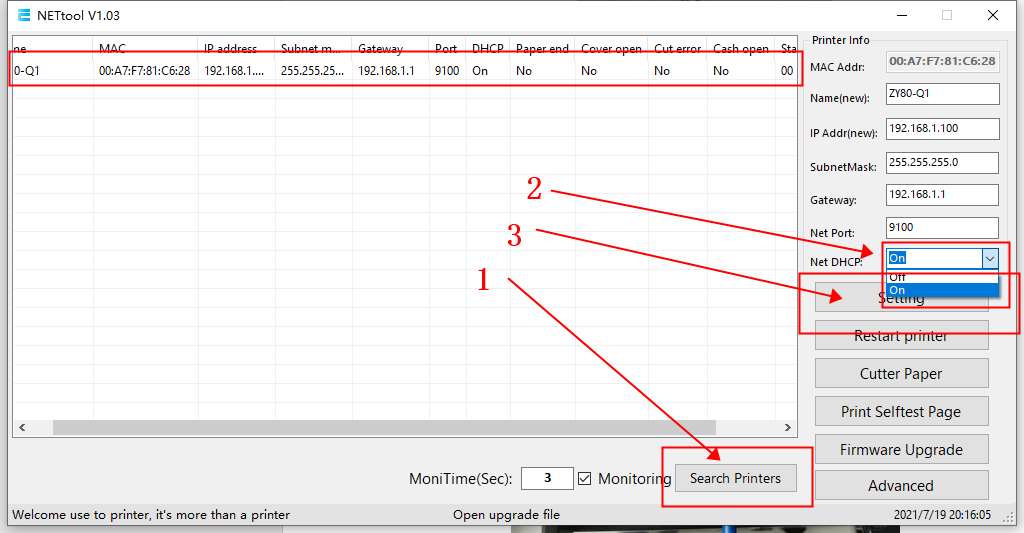
- Rename to "TM-m30" (Optional Step)
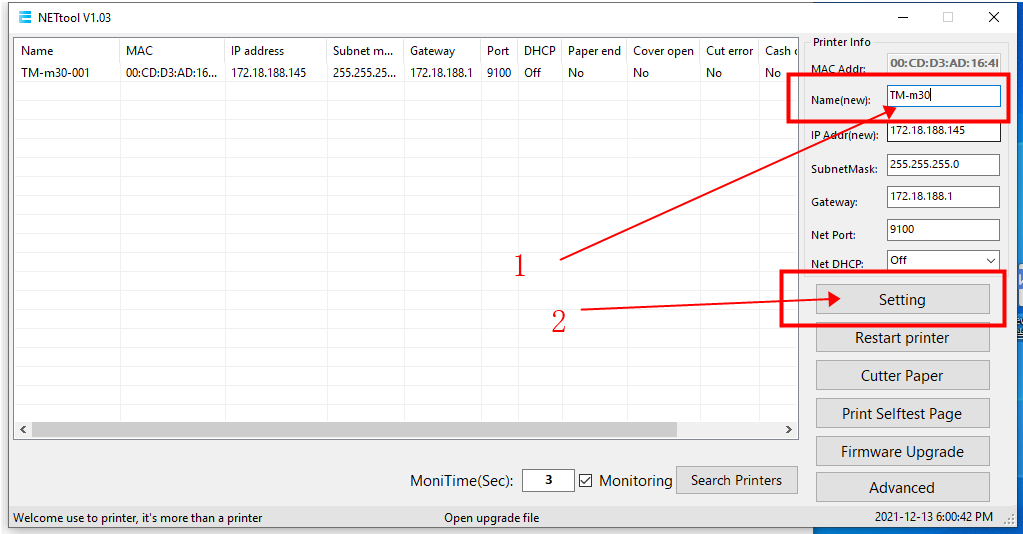
- Save and close
WiFi :
Note: Our WiFi Printer currently only support printing via WiFi IP configuration and pairing. Using USB connection to Square terminal will not work properly. Please follow below steps to setup correctly.
IF using Wifi, and the printer is connected to WiFi network already, you should be all set. Please proceed to connecting square register to the printer via Advanced Printer Setup below. If NOT connected to WiFi network, please refer to article here: https://help.volcora.com/support/solutions/articles/73000615641-how-to-connect-my-printer-to-wifi-network-
Do a self-test print to check IP (Turn off printer -> Hold on to the Feed button -> Turn on printer with Feed button held -> Release Feed button after 5 seconds, self test should be printed with IP)
Connect Square Register and Printer
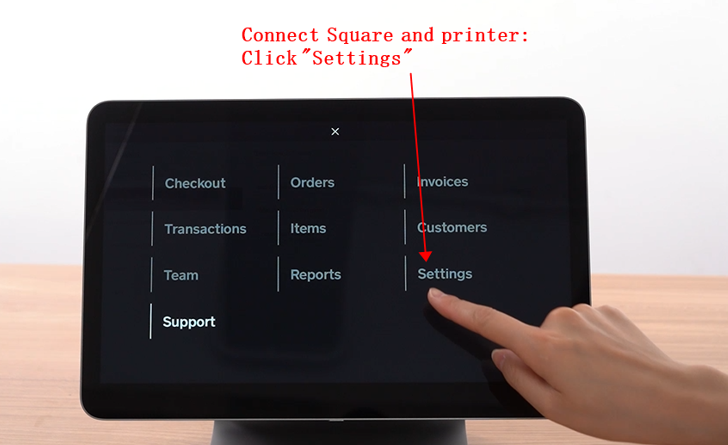
1. Connect Square Register and printer, and click "Settings".
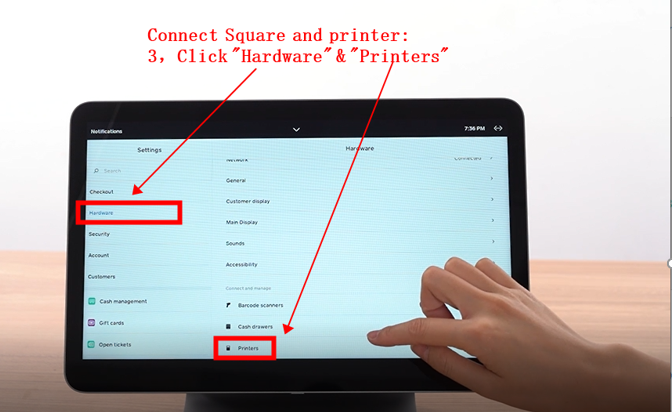
2. Click "Hardware" & "Printers".
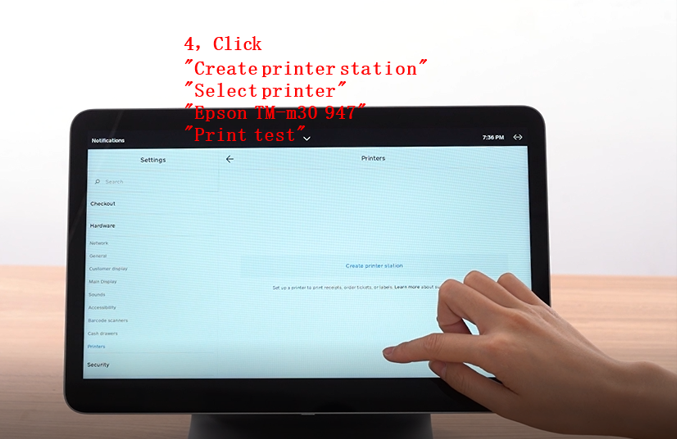
3. Click "Create printer station"->"Select printer"->"Print test". (If connecting via Ethernet or WiFi, you may need to select "Advanced Setup" and select "Epson" printer, and input IP address to pair)
4. Print test paper.
5. You are all set!
Was this article helpful?
That’s Great!
Thank you for your feedback
Sorry! We couldn't be helpful
Thank you for your feedback
Feedback sent
We appreciate your effort and will try to fix the article