Method A (Change IP Via USB) :
- Use USB to connect to your PC
- Use a network cable to connect the printer and the computer to the same router
- Open the Testing tool (download from volcora.com/support), with USB selected, click Set DHCP, this will automatically assign an IP address for your printer. Do a self-test print to check IP (Turn off printer -> Hold on to the Feed button -> Turn on printer with Feed button held -> Release Feed button after 5 seconds, self test should be printed with IP)
- If you prefer manually setting IP, fill in the new IP section and click Set New IP

Method B (Change IP Via ETHERNET) :
- Download NET Setting Tool from Support site
- Use a network cable to connect the printer and the computer to the same router
- Open the tool, switch the ‘Net DHCP’ on according to the steps in the figure below
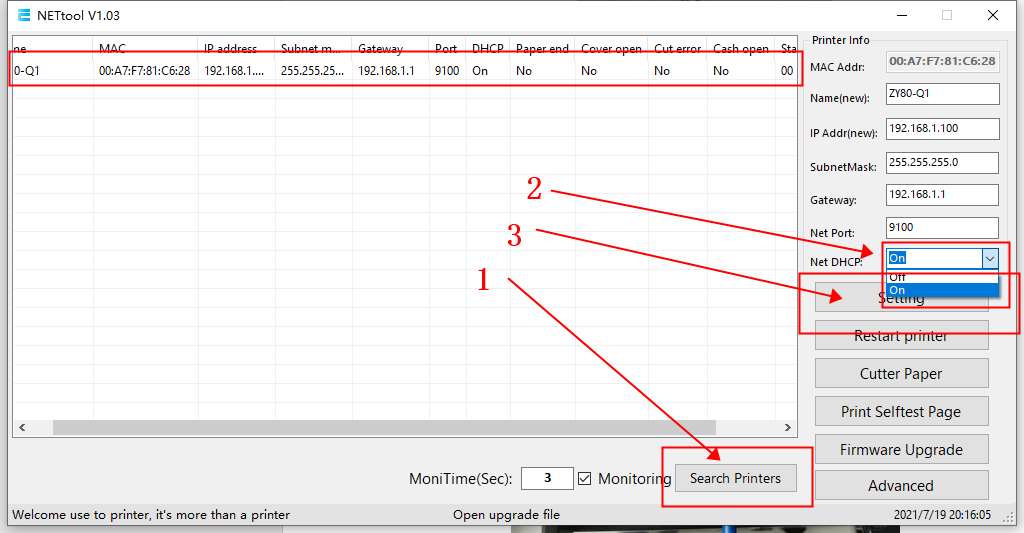
- Save and close, You should be able to get an IP address. Do a self-test print to check IP (Turn off printer -> Hold on to the Feed button -> Turn on printer with Feed button held -> Release Feed button after 5 seconds, self test should be printed with IP)
Method C (Change IP via Android App)
- Download EMLabel App on Android
- Select WIFI
- Input the IP address of the printer (Note: Printer needs to be connected to the same network and DHCP fetched IP, if not, please reset printer to auto-fetch IP)
- Click 'Connect'
- If connected, click the gear/setting button at the bottom of the page
- Select LAN Settings
- Input the IP desired (Please ensure they are in the same sub-net)
- Press Set/Save
Was this article helpful?
That’s Great!
Thank you for your feedback
Sorry! We couldn't be helpful
Thank you for your feedback
Feedback sent
We appreciate your effort and will try to fix the article